
Reporting document data in Docusign eSignature
Edward Ratanasena provides a step-by-step guide to creating custom reports from the data collected from Docusign eSignature envelopes.
- Example: How many students have stated they have a medical condition on the enrolment form?
- Prerequisites
- Step 1: Prepare an eSignature template
- Step 2: Create a new online spreadsheet
- Step 3: Create the Agreement Action Connection
- Step 4: Create the Agreement Action Rule
- Step 5: Test your new Agreement Action
- Step 6: Create a mapping tab (optional)
- Step 7: Create charts and pivot tables as required (optional)
- Conclusion
- Additional resources
Table of contents
- Example: How many students have stated they have a medical condition on the enrolment form?
- Prerequisites
- Step 1: Prepare an eSignature template
- Step 2: Create a new online spreadsheet
- Step 3: Create the Agreement Action Connection
- Step 4: Create the Agreement Action Rule
- Step 5: Test your new Agreement Action
- Step 6: Create a mapping tab (optional)
- Step 7: Create charts and pivot tables as required (optional)
- Conclusion
- Additional resources

Have you ever wanted to view data in real time collected from your eSignature forms? For example, “how many people have accepted the new ‘Work from home’ policy”? Or “how many people have stated they have a medical condition on their form”? Docusign eSignature reports provide data such as envelopes sent and completed but not data collected within your form or document.
That’s where Docusign Agreement Actions comes in; Agreement Actions, with its many pre-built integrations, are a powerful way to automate downstream actions (such as pushing data to a custom report). Combined with the power and flexibility of online spreadsheets such as Google Sheets or Microsoft Excel online you can create custom reports that provide data in real time of the information captured within your envelopes. This is particularly useful when you’re about to bulk send a large volume of envelopes, or you have a PowerForm live.
Important: The Agreement Action needs to be set up before you collect completed envelopes from which you would like to report. If you have already started receiving completed envelopes and you would like to report on this data, you can use Docusign Retrieve (however, this data will not be reported in real time, and Docusign Retrieve may not be included in your license).
Example: How many students have stated they have a medical condition on the enrolment form?
Let’s say you’re a school and you’ve just compiled the list of students to whom you would like to send an enrolment form. On the enrolment form, you ask if the student has any medical conditions of which the school should be aware. One way is to open each completed document and count how many students have ticked the medical condition box. A better way is to utilize Docusign Agreement Actions. So, how do you set this up?
Prerequisites
Agreement Actions
eSignature Administrator Access
Google Sheets or Microsoft Excel Online (this guide uses Google Sheets)
Note: The Agreement Actions feature is not included with all account plans. If you do not see Agreement Actions in eSignature Settings, it may not be enabled for your account. Contact Docusign Support for assistance.
Step 1: Prepare an eSignature template
If you don’t already have an eSignature template, you’ll need to create a new one (see Create Templates on Docusign Support for steps on how to create an eSignature template). Ensure any fields you want to report on are labelled appropriately.

For this demonstration, download this example Enrolment Form template.
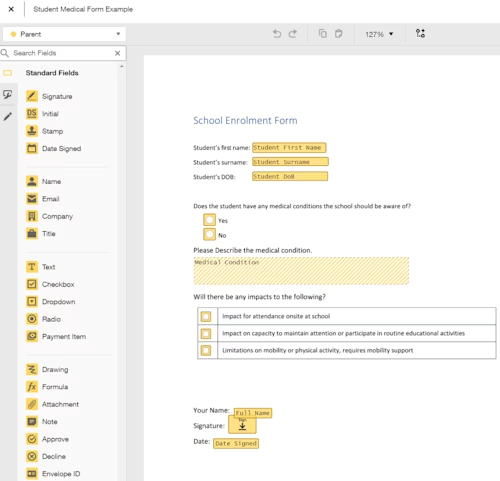
Step 2: Create a new online spreadsheet
Using either Google Sheets or Microsoft Excel online, create a new spreadsheet, which will eventually store and report on your data. Leave it empty for now.
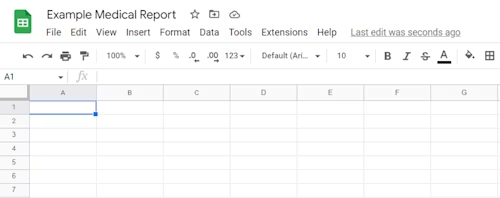
Step 3: Create the Agreement Action Connection
In the Settings > Agreement Actions > Connections section, create an Agreement Action connection to either Google Drive for Google Sheets or Microsoft OneDrive for Excel online. See the guide Automate Common Post-Signature Tasks with Agreement Actions on Docusign Support for further details.

Note: If you don’t see the Agreement Actions section, this means your account does not have the feature enabled.
Step 4: Create the Agreement Action Rule
On the Rules page, create an Agreement Action where the condition is the template name is the one prepared in Step 1. The action is to export to the spreadsheet created in Step 2. Save the Agreement Action.
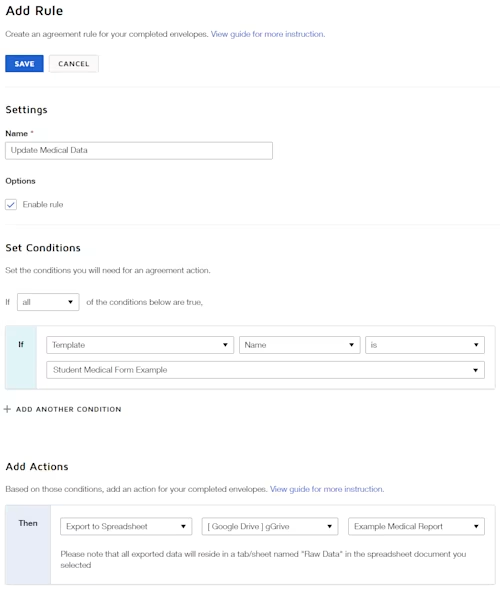
Step 5: Test your new Agreement Action
Send an envelope to yourself using the template prepared in Step 1. Fill in all the fields and complete the envelope.
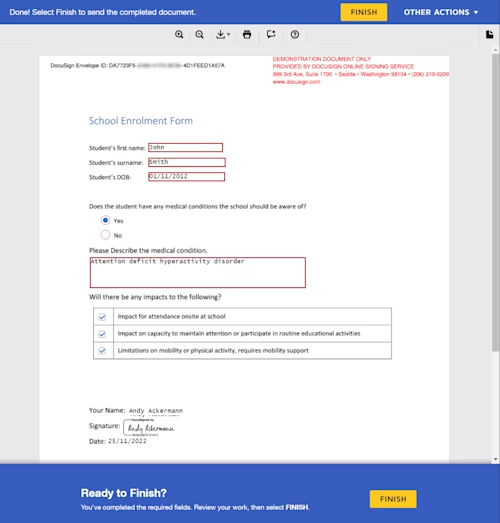
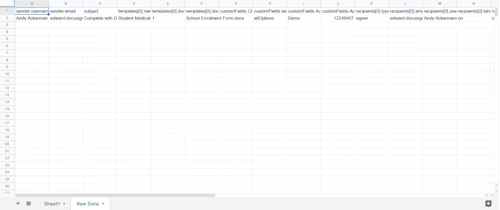
If the Agreement Action is working correctly, there should be a new tab created in your spreadsheet called Raw Data. This tab will contain all the data collected from your designated template.
Step 6: Create a mapping tab (optional)
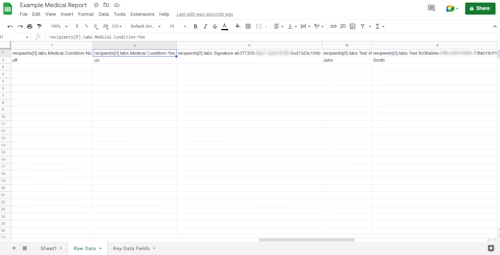
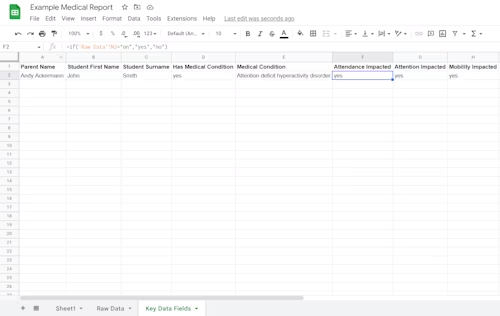
The data captured in the Raw Data tab may not be in the form you desire. For example, the data from the Attention Impact checkbox is represented as “on” or “off” in the Raw Data tab; however, you may want it represented as “yes” or “no”. Creating a separate tab to map this data can solve this issue.
You will see in my example below that my mapping tab labelled as Key Data Fields is much easier to read compared to the Raw Data tab.
Step 7: Create charts and pivot tables as required (optional)
This step really depends on how you wish to consume your data. If you are happy with consuming the data in tabular format, then you’re done!
If you have large volumes of data, you may wish to structure and chart your data further. I recommend you create any data calculations and charts based on the mapping tab (created in Step 6).
Note: If you change your template (such as adding additional fields), you will need to clear the Raw Data tab as Docusign requires an empty Raw Data tab so it can populate the columns appropriately. If the existing Raw Data tab does not correspond with the template, then the Agreement Action will not add any new rows of data. This is an added benefit of creating a mapping tab (Step 6): it enables you to reuse any charts you may have already created if you change your eSignature template.
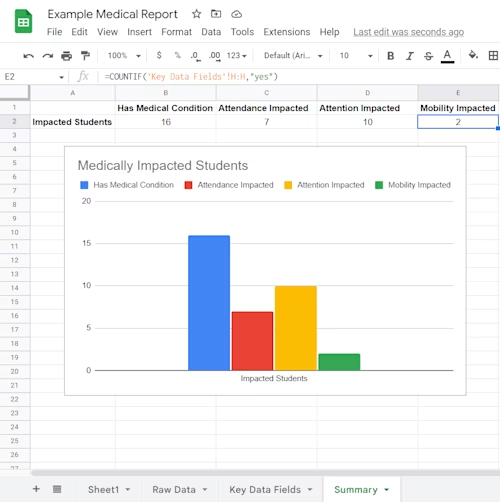
In the example below I’ve completed a few more envelopes and created a Summary tab with an example of a chart you might use to report data.
Conclusion
Connecting Agreement Actions to Google Sheets or Microsoft Excel Online lets you collect any data you wish from completed envelopes generated by a template. This makes it easy to extract the information you need in a format you can readily use and share.
Additional resources

Edward Ratanasena is passionate about finding innovative solutions to problems. He's been with Docusign since 2020 as a solutions engineer helping customers find the best possible solution to their business needs within their constraints.
Related posts
Discover what's new with Docusign IAM or start with eSignature for free


