
Expanding Power Automate Series: Create a custom Docusign Connect flow

One of the amazing features that Docusign provides is Docusign Connect, which enables customers to receive real-time updates when specific triggering events occur in their eSignature workflows. The combination of Docusign Connect with Microsoft Power Automate is powerful when it comes to automating your business processes.
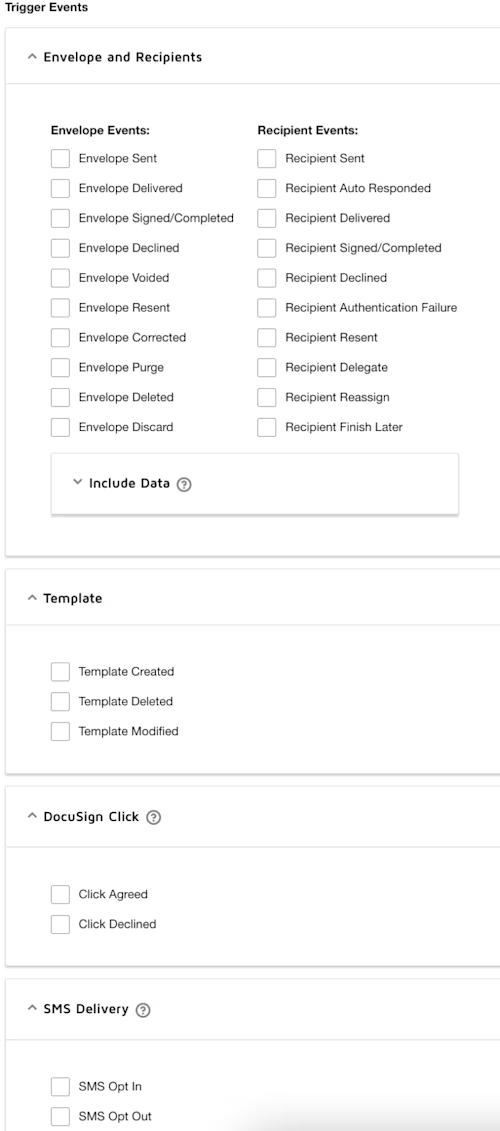
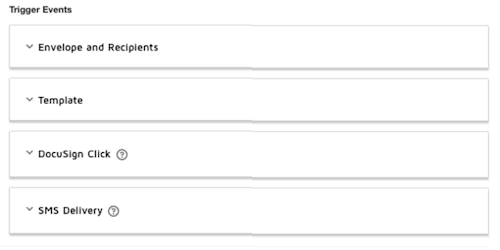
There are two ways to use Docusign Connect with Power Automate. One is to use the prebuilt Docusign Triggers that can be found in the Docusign Connector for Power Automate. The second is to create your own custom connector as we will see later on in this article. Using the pre-built triggers will allow you to quite easily trigger flows when an envelope status changes. Creating a custom connector expands on this by allowing you to trigger based on 20+ different trigger statuses, in particular around each recipient event, Template events, or even if a customer opts in or out of SMS delivery. See these events in the screenshot below.
Step 1: Create a custom connector on Power Automate
Follow the Get into the flow of sending Docusign Envelopes with Microsoft Power Automate article to create a custom connector.
In the “Definition” step, add a Get Envelope action.
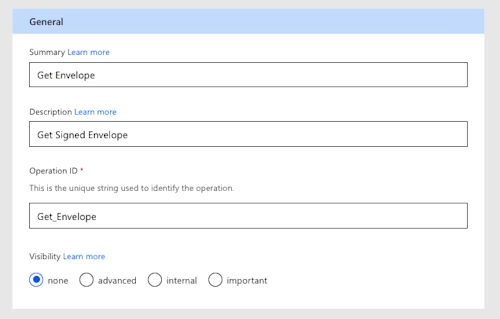
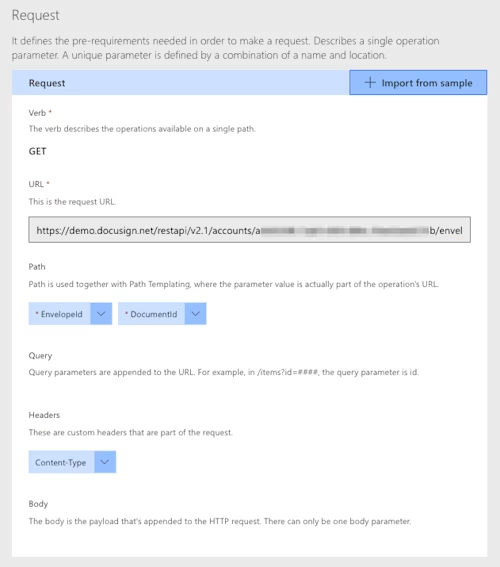
Under Request, select Import from sample
Enter these values:
Verb: GET
URL: https://demo.docusign.net/restapi/v2.1/accounts/[your Account ID]/envelopes/{EnvelopeId}/documents/{DocumentId}. Replace [your Account ID] with your API Account ID and leave {EnvelopeId} and {DocumentId} as is
Headers: Content-Type application/json
This will result in a request as in the screenshot below.
Step 2: Webhook for testing
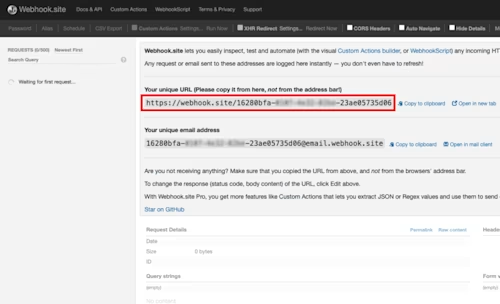
We will need a sample payload from Docusign Connect later on when configuring the flow on Microsoft Automate. Personally, I like to use https://webhook.site/ as a testing webhook but feel free to use whatever you feel comfortable with.
Once you open https://webhook.site/, you will be given a unique URL as in the image below. Copy that URL to your clipboard and don’t close this browser tab, as you will need it later on in the following steps.
Step 3: Configuring Docusign Connect with the testing webhook
Log in to your Docusign account using your admin user.
Go to the Settings tab at the top of the page.
In the left nav, select Connect.
On the Connect panel, select the Add Configuration button
Give your Connect configuration a name by typing a name of your choice in the Name field
Paste the webhook unique URL you copied from Step 2 into the URL to Publish field.
Check Enable Log and Require Acknowledgement (recommended but optional).

In the Trigger Events section, choose the trigger that fits your use case. For the sake of this example, I will choose Envelope Signed/Completed under Envelopes and Recipients).
Select Save Configuration at the bottom of the screen.
Step 4: Sample payload
Depending on the event trigger you choose in Step 3, you now need to do an action to actually trigger Docusign connect.
Since I chose Envelope Signed/Completed, I need to send an envelope and complete it to trigger Docusign Connect to send a payload notification to my webhook listener.
After I have sent and completed an envelope, the webhook listener should receive a payload notification as shown below.
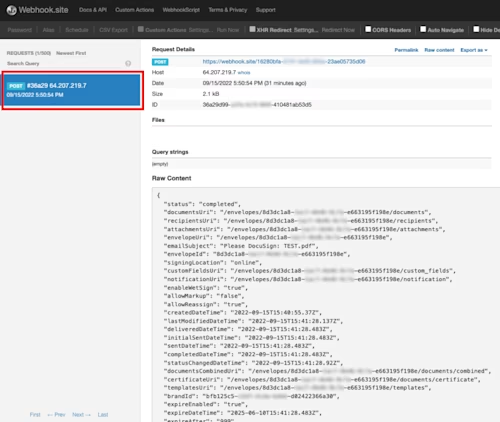
Copy the raw content of the payload notification as we will need it in the next step.
Step 5: Creating the flow
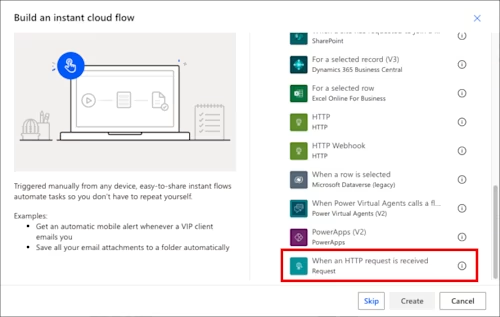
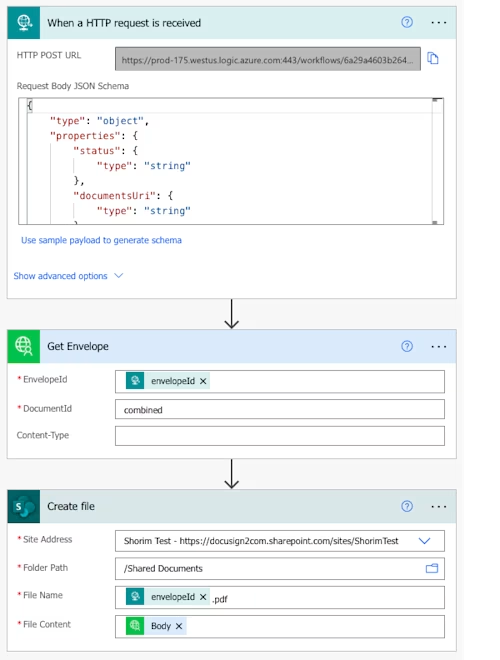
Go to Power Automate, select Create to create a new flow, then choose Instant cloud flow. Give it a name of your choice, and under Choose how to trigger this flow, select When an HTTP request is received, then click Create.
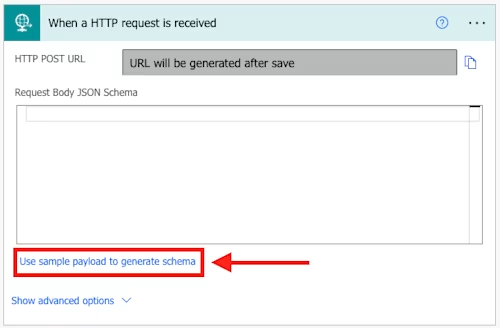
This will create a new flow with just one step, which is the HTTP trigger. Select use sample payload to generate schema and paste the raw content of the payload notification copied from the previous step; then select Done.
Add the Get Envelope action created in Step 1, and in the EnvelopeId field, insert the dynamic content envelopeId that is extracted from the HTTP trigger. In the DocumentId field, insert the document ID needed or the string “combined” to get the full envelope.

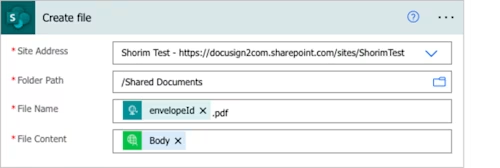
Add the final step, which is creating a file on a SharePoint site. Choose the Site Address and the Folder Path. Then, in the File Name field, enter the name of your choice, or you can use the dynamic content envelopeId as a name of your file; but remember to add “.pdf” as the extension inside the file name.
In the File Content field, insert the dynamic content Body that is extracted from the Get Envelope action.
Save the flow so that the HTTP POST URL in the flow trigger gets generated. Copy that URL and paste it into the configuration of Docusign Connect, replacing the URL you used from the testing webhook.
Your final flow should look like this.
Now, if you complete an envelope on your Docusign account, your flow will be triggered and the completed envelope will be saved on your SharePoint site.
Additional resources

Ahmed Shorim has been with Docusign since 2021 as a Senior Developer Support Advisory Engineer. His work is focused on advising developers on how to integrate with Docusign APIs and SDKs by consulting on best practices and providing code examples. Experienced in developing web, mobile, and desktop applications along with building automation flows, he can be reached at LinkedIn.
Related posts
Discover what's new with Docusign IAM or start with eSignature for free


