How to Write an Executive Summary

Do you want to switch to our US site?
Your step-by-step guide to setting up Docusign with Microsoft Power Automate, to streamline those critical business processes you use every day even more.

If you’re a power user of Microsoft tools, then you’ll want to know about Docusign’s integration with Microsoft Power Automate. As we explore below, it’s easy for you to use Docusign’s core eSignature capabilities within Microsoft, saving you time and hassle when getting those important business contracts signed.
Already, fans of Microsoft Power Automate (previously called Flow) will know that it’s a great tool for streamlining repetitive tasks and making processes paperless. It’s why the tool is such a great fit with Docusign – we’re all about going paperless and automating key tasks, too.
Let’s take a look at how it works.
Our example: Creating a workflow when a new file is created in SharePoint
The example we’re using in this article is triggered when a new file is created in a specific folder in SharePoint. Note that the same workflow can be easily configured for a different trigger to meet your specific business needs, for example:
In procurement, a trigger could occur when a tender/project status is changed in a SharePoint list to automatically send an approved contract for execution
In HR onboarding, when a new employee is added, the onboarding pack (personal profile, payroll data collection, NDA, etc) is automatically sent through an approval and signature workflow
This is an example of a custom Flow built using Docusign API. Note that you can also access a great range of Docusign pre-built connectors within Power Automate that require zero code. You’ll find this super useful in more advanced scenarios where access to the full API provides more options than the pre-built connectors.
As you’ll see below, the whole process is completed in three steps – first, you need to set up Docusign, then make some quick changes to the actual document for signing, and then set up Microsoft Power Automate. Since it uses the Docusign API, the process follows the standard ‘Go-Live’ process, which means you need to use your Docusign developer account (which you can create here). Once complete, you can promote to production using that same Go-Live link.
Step 1: Docusign Setup
Login to Docusign Admin and make a note of your Account ID (see top left)
Create an Integration Key, a special key that enables the API-level authentication:
Go to Integrations > API and Keys, and note down the “Account’s Base URI”. We will refer to this as the Base URL.
then “Add App / Integration Key”, note down the Integration Key
Select “Authorization Code Grant” radio button, then click “Add Secret Key”, and note down the Secret Key
Click “Add URI”, and add the following: https://global.consent.azure-apim.net/redirect (this may change as its generated by Power automate, but this initial value will work for now). Please note down this value of the Redirect URI for now.
Create Custom Fields
- Go to Signing and Sending > Document Custom Fields, click “Add Field”
- Choose which fields you’d like to add (e.g. signature, name, signing date) and follow the prompts. For example, if you want to add a Signature field, the recommended values are:
a. Name: Signature
b. Type: Sign Here
c. Shared: Tick (yes)
d. AutoPlace Text: \s{r}\
Step 2: Signing Document Setup
You only need to make minor changes to the document you want signed – to flag where the Docusign tags/fields should appear (see “Custom Fields” above). Simply enter the special “AutoPlace text” you created when setting up Custom Fields anywhere in the document that you want those fields to appear.
For example, the image below shows a Word document that needed two signers: “\s1\” for the first signer, “\n1\” for the full name of the signer, and “\d1\” for the date of signing. And “\x2\” for all the details of the second signer.

Just remember, in your final version, make the AutoPlace text white in colour (so it’s hidden from view)!
Just remember, in your final version, make the AutoPlace text white in colour (so it’s hidden from view)!
Step 3: Microsoft Power Automate Setup
The final Microsoft Power Automate configuration should look like the following:

Let’s go through each step now.
Create a Custom Connector
In the diagram above, this is the final step “Send Document to Sign”. This needs to be setup before the Flow is created.
Go to Power Automate, select Data > Custom connectors.
From the top right menu, select New custom connector > Create from blank.

Give it a useful name, as this will be reused whenever you want to call this Docusign step in your flow.

General
Input these details below:
Host: Base URL [captured earlier]
Base URL: /restapi/v2.1

Security
On the next screen, enter the details below
DEMO:
IKey: Integration Key [captured earlier]
Secret Key: Secret Key [captured earlier]
Authorization URL (DEMO): https://account-d.docusign.com/oauth/auth
Token URL (DEMO): https://account-d.docusign.com/oauth/token
Refresh URL (DEMO): https://account-d.docusign.com/oauth/token
Scope: signature extended
PROD:
IKey: Integration Key [captured earlier]
Secret Key: Secret Key [captured earlier]
Authorization URL (PROD): https://account.docusign.com/oauth/auth
Token URL (PROD): https://account.docusign.com/oauth/token
Refresh URL (PROD): https://account.docusign.com/oauth/token
Scope: signature extended

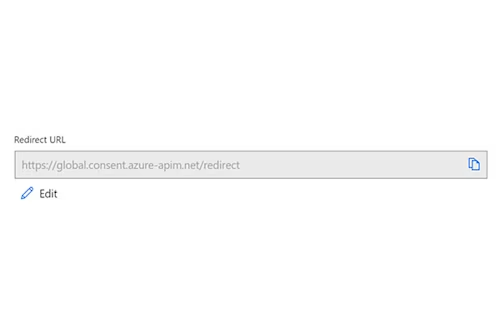
Click “Create Connector”. Double check the newly generated Redirect URL and ensure it matches the Redirect URI from the Integration Key created in Docusign
Definition
Create a new Action, give it a useful name, and unique Operation ID.
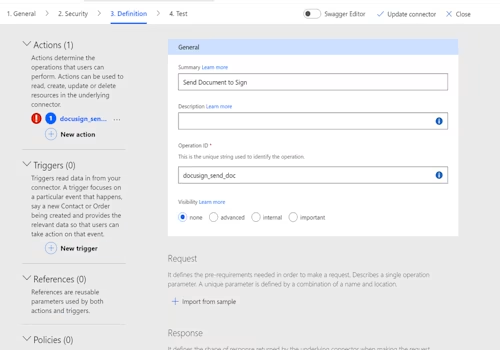
Under Request, select “Import from sample”
Enter these values
Verb: POST
URL: https://demo.docusign.net/restapi/v2.1/accounts/\[your Account ID]/envelopes
Headers: Content-Type application/json
Body:
{
"documents": [
{
"documentBase64": "[variable]",
"documentId": "1",
"fileExtension": "txt",
"name": "Doc1",
"order": "1"
}
],
"emailSubject": "Test Envelope 1",
"recipients": {
"signers": [
{
"email": "[enter signer email address]",
"name": "[enter signer name]",
"recipientId": "1",
"roleName": "Signer 1",
"routingOrder": "1"
}
]
},
"status": "sent"
}
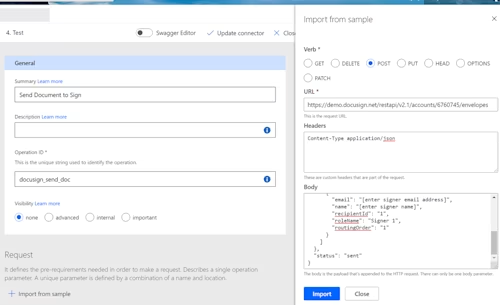
Select “Import” to complete this section
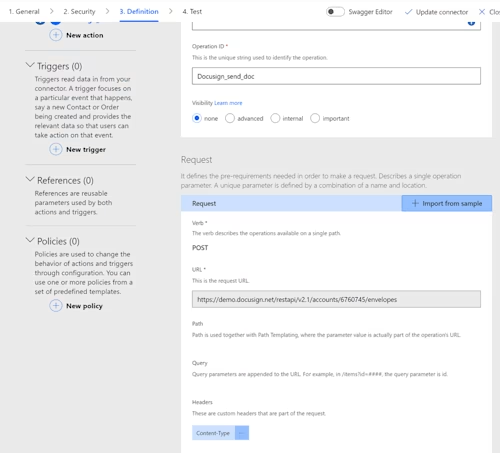
Test
Now let’s test our connection.
On the next section, select “Update connector”. Now click “New connection” and login with your Docusign credentials

Click Accept to give permission to Power Automate. Once it is completed a new entry will be available from the drop down list confirming it has worked.
The custom connector is now completed, next is to create each step of the Flow.

This is a basic “trigger” step, and could be whatever trigger you had a business requirement. In this example, I am listening to the “/DS Folder/FlowTest” folder, once a new file is created, it kicks off this workflow.
Inputs:
Site Address: - Sharepoint site
Folder id: Folder path

Get file content
This step is required to capture the file content based on the ‘trigger’, so in this example, it’s the content of the new file that was created in that folder.
Inputs:
Site Address: Sharepoint site
File identifier: – This is the output from the previous step. Simply select “File identifier” under “dynamics content” on the right pane. See above screenshot.
Compose
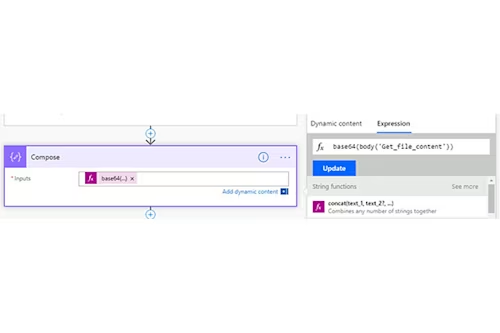
In this step, we take the ‘file content’ we captured in the previous step, and we convert it to base64 format. This is required by Docusign to send using the REST API (that will be the final step below).
Input
Inputs: “base64(…)” – within the brackets, go to “dynamic content” and select the “Get file content” (As below). The final function should read: base64(body('Get_file_content'))
Add Custom connector
Add a new step, select Custom > Send Envelope (or whatever you called it).
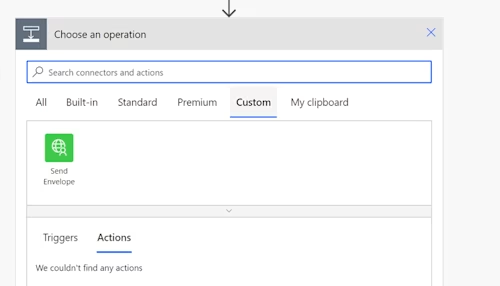
Select the Action we created.

From here complete the fields as below.
The “documents” field will be a variable (the one we created earlier in the Compose Step). Select add dynamic content > Outputs.
Now add the following values:
documentId: 1
fileExtension: txt
name: Doc1
order: 1
emailSubject: Send document for signature
email: [enter signer email address]
name: [enter signer name]
recipientId: 1
roleName: Signer 1
routingOrder: 1
status: sent

Note - For these fields:
"email": "[enter signer email address]","name": "[enter signer name]",
The name and email address of the recipient (signer). Note: You can make this dynamic by collecting the signers name and email from Sharepoint in a previous step, and then use it as input here.
Now save and run it!
To learn more about integrating Docusign technologies into your app or website, visit our APIs page.
Related posts


