How to Sign a Google Doc
Learn how to sign a Google Doc using electronic signatures with this step-by-step guide.

Did you know you can add your electronic signature to a contract, offer letter or other agreements in a Google Doc without ever leaving the application?
Here's how to create an electronic signature and sign a Google Doc in just a few steps.
Create an electronic signature to sign a Google Doc
First, install the Docusign add-on, by either clicking here or following the instructions below.
Create or open a Google Doc. Navigate to the right menu bar and click the plus icon.
Search for Docusign and download the Docusign eSignature for Google Workspace integration. You can also install the eSignature integration simply by clicking here, and installing the integration from the marketplace. When installing the add-on here, you now have access to Docusign eSignature across Docs, Gmail and Drive - all for free.
Once the install is complete, navigate back to the original Google Doc and select Docusign eSignature from the right menu bar.
The first time you use the add-on, log in or create a free account to get signing and collecting signatures. If you don’t already have a Docusign account, you can create a free account to collect signatures from others on up to three envelopes, or upload and sign documents yourself. No credit card required to sign up, so you won’t be charged after you use your three free envelope sends.
You can now use the Docusign eSignature for Google Docs Add-on to sign and send documents.

How to sign a Google Doc electronically
Need to electronically sign a Google Doc? Here’s how to do it:
From your Google Drive account, create a new Google Doc (or find and select the document you want to electronically sign).
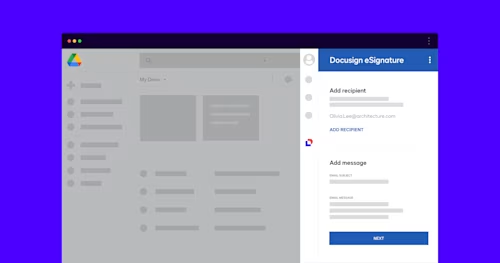
From the open document click the Docusign eSignature icon in the right menu navigation bar. You’ll be prompted to either log into an existing account or create a new free account.
After you log in or create a free account, you’re ready to get started. Next, you’ll be prompted to allow Docusign access to your document, to upload it to Docusign. Once you’re logged in, the document will automatically upload into Docusign directly from Google Docs!
From here, you can Add Recipients to the document who either need to sign the agreement or receive a copy. Click Next once you’ve added all your recipients. Don’t worry, you can always add more later.
Next, add a custom email message for your signers. Once you click Next, you’ll be directed to Docusign to review the signers and message. Here, you can add any additional signers or recipients if needed.
Click Next to add fields to the agreement. Drag and drop a signature field, date field, text field and more to the agreement. Switch the required recipient in the upper left hand corner if you have multiple signers on the agreement. Once all the fields have been added, click Send.
You’ll receive a confirmation message that your document has been sent to the first signer, and will be redirected back to Google Docs.
You’re done! Sit back and relax while Docusign alerts the first signer that their signature is requested.
The completed document is added to your Drive account in a unique folder labeled Docusign - Completed, which is created automatically the first time you sign or send a Google Doc for signature. You can also find the completed document in your Docusign account, by logging in and navigating to the manage tab.
Once finished, you can close the browser tab, view the document in the unique Docusign Drive folder, email a copy of the document, see document details, or download the document to your computer.
Learn more about how to use Docusign eSignature with your Google Workspace and install the add-on.

Yasamin Yousefi is a director of product marketing for Sign products at Docusign.
Related posts
Docusign IAM is the agreement platform your business needs


