Code ExamplesPublished Oct 30, 2024
Please Mr. Postman: Using the Docusign API Postman collections
Summary•8 min read
Postman is the most popular tool for testing and expermenting with Dcusign API calls. Let us make it easier for you to use it with our API collections.

The Marvelletes have been waiting for the postman, but here at the Docusign API team, we have no time to wait. To accelerate your Docusign development, we provide the Docusign public Postman collections.
What are Postman collections?
As the Postman website puts it, “Postman collections are portable sets of API requests that you can reuse, automate, and share with others. You can use a collection to save important details for each API request, such as the authorization type, parameters and headers, request bodies, scripts and variables, and documentation.” So, the Docusign public Postman collections let you test Docusign API calls in the Postman app and use the results to help you develop your Docusign integrations.
We provide Postman collections for the following APIs:
How to use the Docusign Postman collections
To use the collections, you must first create a Postman account and install the Postman app on your computer. The app is available for Linux, macOS, or Windows. Once it's installed, you can launch the app directly if you want to try it out, but to use it with the Docusign collections, you need to personalize it with your own information.
Setting up your personalized Postman configuration
Before you can use Postman with Docusign APIs, you need to configure it. Configuration is a one-time process that imports the Docusign collection you choose and creates an environment with your API credentials so you can easily execute calls. To configure Postman for the Docusign collections, follow these steps:
Make sure you have a Docusign developer account. If you don’t have one, you can create one for free.
Create a new integration key and secret key in the Docusign Apps and Keys page inside the Docusign Admin application. (Take a note of the secret key, as you can only see it once when you create it.) You will also have to add at least one URL in the Redirect URIs list for this integration key. We recommend you use something like “https://www.example.com/callback” (I’ll explain later how you use this).
Navigate to the Using the Docusign API Postman collections page.
Select Set Up Your Environment. The dialog box shown in figure 1 appears and prompts you to enter your integration key and corresponding secret key, which you created in step 2 above.
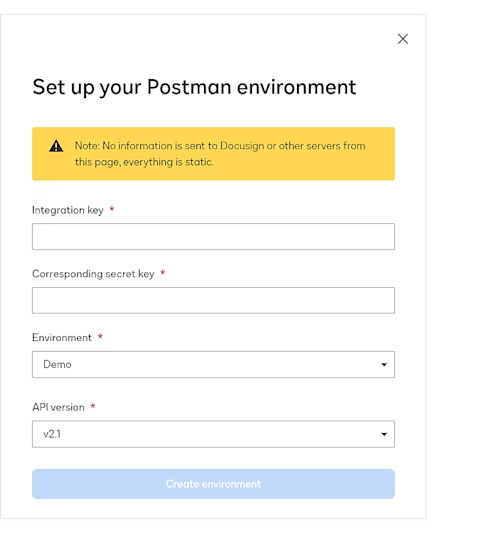
Figure 1. Configuring the initial environment to be used with a Docusign Postman collection
You can leave the Environment (Demo, which is the developer environment and what we will discuss in this blog post) and API version default settings.
Select Create environment.
From the list of APIs below the button, choose the API you want to install and select Run in Postman.
You’ll see the prompt from Postman shown in figure 2 to fork the collection:

Figure 2. Fork the chosen Docusign Postman collection into your own Postman workspace.
Select Fork collection. This opens a dialog on the Postman website, shown in figure 3, to configure your fork:
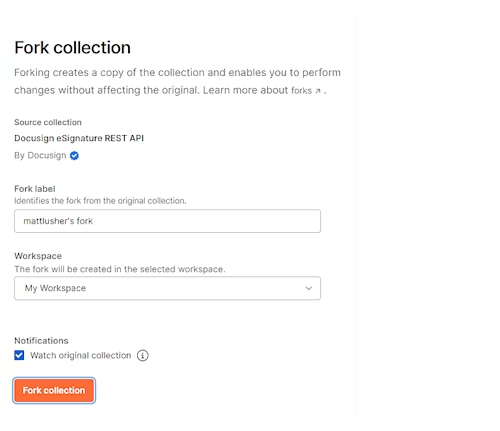
Figure 3. Configuring your fork
Optional on Windows: Another security popup (see figure 4) may require you to select Open Postman before the application launches.
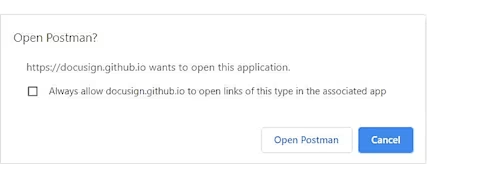
Figure 4. Additional security popup on Windows before launching the application
Using Postman to make Docusign API calls
After you follow the preceding steps and configure Docusign in Postman, you are ready to start using it. In the Postman app, select Collections. If you installed the eSignature collection, your app should look like figure 5.
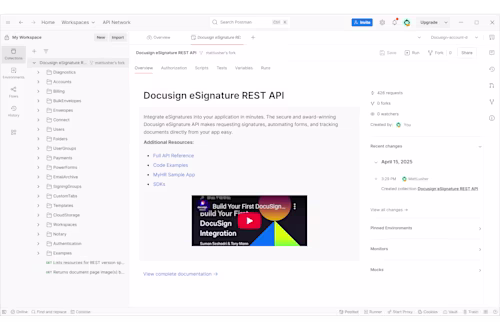
Figure 5. Postman after Docusign eSignature REST API import
Running the authentication code
Before you proceed, make sure to select Docusign-account-d (since you selected Demo when setting the environment, it will be a different name for production) from the environment dropdown at the top-right corner of the Postman window to ensure the environment information you created earlier is applied to the variables inside the calls.
These steps show you how to use Authorization Code Grant to obtain an access token to make your API calls from Postman. You may also use JWT (JSON Web Token Grant) if you prefer.
To start the authentication process, you have to manually construct a URL that looks like this:
https://account-d.docusign.com/oauth/auth?response_type=code&scope=signature&client_id={iKey}&redirect_uri={callback}
Note: The scope in this URL is required for the eSignature API. If you are working with a different Docusign API, include its required scopes. See Authentication scopes for details.
Remember to replace {iKey} with the integration key you created earlier and replace {callback} with the redirect URI you have configured for it. After you enter this URL in the browser, you should expect to see the Docusign login screen for the developer environment, where you can enter your credentials to your account. If this is your first time using this new application, you should also see the consent dialog shown in figure 6. Select Allow Access to allow your app to make API calls to Docusign using this newly created integration key.
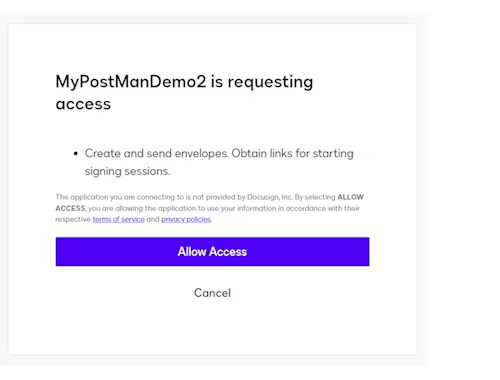
Figure 6. You must grant consent to your integration in order to make API calls to Docusign.
If it’s configured correctly, you should now be redirected back to your redirect URI with an additional URL parameter called code. That parameter contains a long code that can be used to obtain an access token to make API calls. Open the Postman collection and expand the folder on the left that's labeled with the name of the API you are working with. Then expand the Authentication folder and select 01 Authorize Code Grant Access Token.
Select the Body tab and copy/paste this code into the code key/value pair (replacing the {{codeFromUrl}} value). Note that the code is valid for two minutes only. If you don’t send this information to Docusign quickly enough, you will have to obtain a new code again. Hit the Send button at the top of Postman to make the call to Docusign. If successful, you should get back an access_token and refresh_token (figure 7). These will be automatically stored in the Postman environment for you.
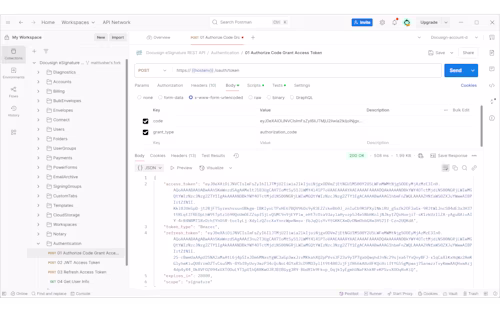
Figure 7. The result of the 01 Authorize Code Grant Access Token request
The next call you have to make is 04 Get User Info. This is the last call in the Authentication folder and can be made as soon as you obtain the access token; you don’t have to paste any values into this call. The Get User Info call is used to populate additional environment variables such as your accountId, userId and baseUrl required to make any Docusign API call.
Once you’ve completed the Get User Info call, select the root of your chosen Docusign collection and click the variables icon to the right of the “Docusign-account-d” environment at the top right of the Postman app. This opens the Environments panel, showing you all your environment variables to confirm you have what is needed to start making Docusign API calls (figure 8).
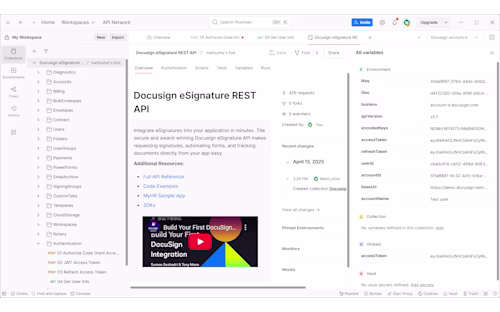
Figure 8. The Postman environment includes four new parameters after completing the authentication calls to Docusign.
Making your first Docusign eSignature API call with Postman
The Docusign API Collection that you imported includes the full set of API calls for your chosen API, including every possible parameter. I'm not going to cover them all in this blog post; instead, I'll show you how to make a simple eSignature API call to create a new envelope. To do so, you'll have to provide some data.
Scroll down and expand the Envelopes category/folder, where you can find different API calls related to envelopes. Select the POST Creates an envelope call. When you open it and select the Body tab in Postman, it should look like figure 9:
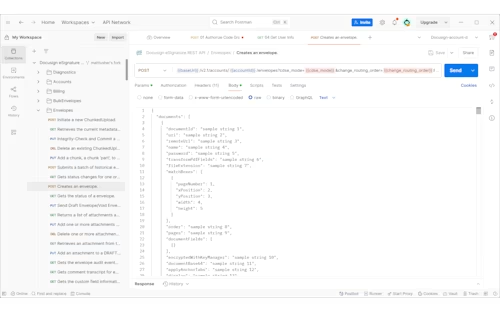
Figure 9. The POST Creates an envelope call without customizations
Remove the entire body and replace it with a simple JSON body to create an envelope with a single recipient and short single document. That JSON looks like this (replace email@domain.com with your email address):
{
    "emailSubject": "Please sign this document set",
    "documents": [
        {
            "documentBase64": "dGVzdCBkb2M=",
            "name": "Lorem Ipsum",
            "fileExtension": "txt",
            "documentId": "1"
        }
    ],
    "recipients": {
        "signers": [
            {
                "email": "email@domain.com",
                "name": "Your Name",
                "recipientId": "1",
                "routingOrder": "1",
            }
        ]
    },
    "status": "sent"
}
Before you run this, though, you do need to make one more change. Go to the Headers tab in Postman, expand the hidden auto-generated headers, and uncheck the Content-Type header. The default Content-Type is required for this call.
If the call was successful, expect to get back an envelopeId, which is a GUID value. You should also get an email from Docusign to the email address you used, asking you to sign the document.
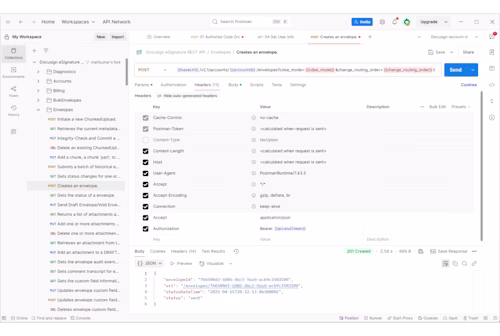
Figure 10. Successful API call to create and send an envelope
That’s it. You made your first Docusign eSignature API call! There’s a lot more to do and explore with the Docusign Postman collections. Have fun!
Additional resources

Matthew LusherSr. Programmer Writer
Matt has been working for Docusign since 2017. As editor for the Docusign Developer Content team, Matt edits and writes content for the Developer Center and the Developer Blog. He also composes and produces the monthly Developer Newsletter. You can reach him on LinkedIn.
Related posts
- DevelopersPublished Nov 8, 2022
Introducing OAuth for Connect: enhanced security for webhooks
- SDKs and ToolsPublished Jun 7, 2021
Updated Docusign University Learning Portal for Developers


Code ExamplesPublished Oct 30, 2024
Fast-Track Your Extension Apps with Reference Implementations
DevelopersPublished Nov 8, 2022
Introducing OAuth for Connect: enhanced security for webhooks
SDKs and ToolsPublished Jun 7, 2021
Updated Docusign University Learning Portal for Developers
Discover what's new with Docusign IAM or start with eSignature for free