New code example: Document visibility
Raileen Del Rosario shows you how to use the eSignature REST API to control which recipients see which documents in your envelopes.
Table of contents

Welcome back to another code example! In my last post, I went over the How to send an envelope to an In Person Signer example. Today, I will go over another new code example for the eSignature REST API. Our new How to set document visibility for envelope recipients example demonstrates how senders can set documents to be visible to and signed by specific signers. This can be useful to senders who only want certain documents to be visible to a recipient, such as in this scenario demonstrating a human resources workflow for allowing the offer letter to be visible to a recipient, but not the finance approval document. This example is included in our Quickstart projects and can be run in eight different programming languages.
Setting document visibility
To try out the new example, you first need to download and run your own personalized Quickstart project. See our Docusign Quickstart overview for directions on how to do that. You also need to make sure that document visibility settings are enabled on your developer account. You can find directions on how to do that on the how-to article for this code example.
Once you’ve run your Quickstart and are at the launcher page shown here (I selected Python for this example):
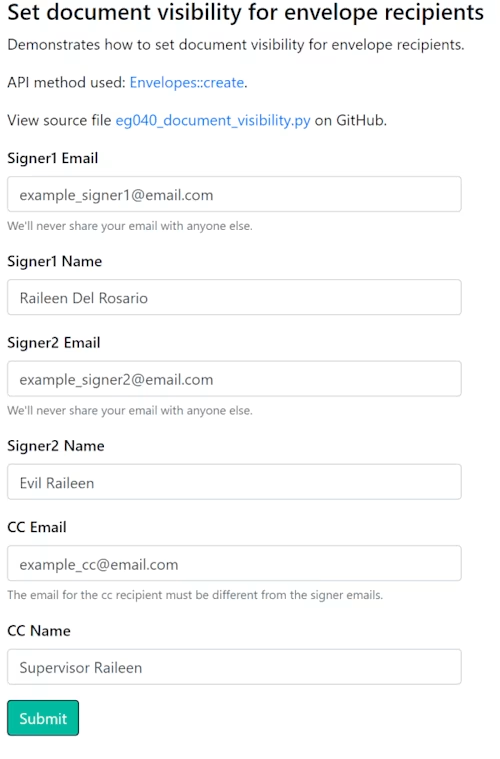
Choose Set document visibility for envelope recipients in the Working with documents section to launch the new example.
The example will prompt you to enter two signer names, the signers’ respective email addresses, and a carbon copy recipient’s name and email address. Complete the fields and select Submit.
Once you’ve selected Submit, the signer recipient models will be created for each signer and the createEnvelope API will be called. For each signer, note that the excluded_documents parameter sets which documents the signer will not be able to view or sign. Signer1 can only see and sign the first document in the envelope, while Signer2 can only view and sign the second and third documents. Meanwhile, the carbon copy recipient receives all three signed documents once both signers have completed their respective signing sessions. The following Python code demonstrates this:
# Create the signer recipient model
signer1 = Signer(
    # The signer1
    email=args["signer1_email"],
    name=args["signer1_name"],
    excluded_documents = ["2","3"], # Sets which documents are excluded for this signer
    recipient_id="1",
    routing_order="1",
    role_name="Signer1"
)

signer2 = Signer(
    # The signer2
    email=args["signer2_email"],
    name=args["signer2_name"],
    excluded_documents = ["1"],
    recipient_id="2",
    routing_order="1",
    role_name="Signer2"
)

cc = CarbonCopy(
    email=args["cc_email"],
    name=args["cc_name"],
    recipient_id="3",
    routing_order="2"
)


# Calling the create envelope API
api_client = create_api_client(base_path=args["base_path"],
    access_token=args["access_token"])

envelope_api = EnvelopesApi(api_client)
results = envelope_api.create_envelope(account_id=args["account_id"],
    envelope_definition=envelope_definition)

envelope_id = results.envelope_id
Now that you’ve learned how this example works, feel free to try it out on your own. The how-to article for this code example can be found on the Developer Center. You can download the source code from GitHub in the language of your choice under Next steps in the how-to article.
Additional resources

Raileen Del Rosario has been with Docusign since 2022. As a Programmer Writer on the Developer Content team, she writes content and code to help developers learn how to use Docusign APIs.
Related posts
- DevelopersPublished Mar 21, 2025
ISV developers: Enhance your product by building a Docusign connector
- DevelopersPublished Mar 13, 2025
Docusign eSignature Integration 101: Setting the foundation


ISV developers: Enhance your product by building a Docusign connector
Docusign eSignature Integration 101: Setting the foundation
Discover what's new with Docusign IAM or start with eSignature for free