From NIGO to STP: A developer's guide to custom data verification and the Connected Fields API

Use the Bash Quickstart to obtain authentication tokens for testing your API integrations.

Sometimes you have an idea or you want to test something really quick. You just need to write some fast and dirty code and you don't want to take the time to set up a whole integration project; the thing holding you back is that you need an authentication token before you can get your test code to work.
You could write an app just to get an OAuth 2.0 token, which is a great solution; but fortunately, there's another way. This is where Docusign Quickstart comes in.
Note: These authentication tokens expire eight hours after they are issued and can only be used in the developer environment, they cannot be used for running real integration code in production.
Docusign Quickstart is a wizard that generates a template application in your choice of Bash, C#, Java, Node.js, PHP, PowerShell, Python, or Ruby, that is preconfigured with your account settings and all required authentication code. It contains everything that you need to start developing Docusign integrations.
Quickstart projects contain code examples you can run that correspond to code in our How-to guides.
Quickstart projects are easy to set up and use. In just a few minutes you can download and run Docusign launchers in the programming language of your choice that contain authentication code and Docusign code examples. All you need to get started is a Docusign developer account. Well… you'll also need a Bash terminal to run the Bash launcher. I use the one that comes with VS Code.
Read the Docusign Quickstart overview to learn more. You can also watch our How to Download Quickstart Demo to help you get started.
It seems like a strange choice, right? Well, it turns out that, once downloaded, set up, and run, the Bash launcher will request an authentication token that you can use to develop your apps!
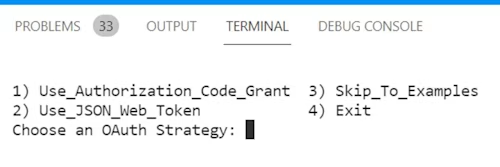
After entering bash launcher.sh from a command line in your project directory, you're prompted to choose which Docusign API examples you want to run:

And then asked to choose an authorization type (either Authorization Code Grant or JSON Web Token).
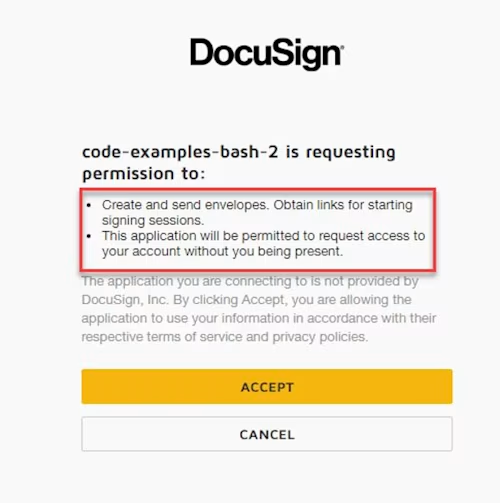
After you log in, you're prompted to click Accept. The launcher will request an access token with a set of scopes necessary to run code examples of the selected Docusign API: for example, eSignature.
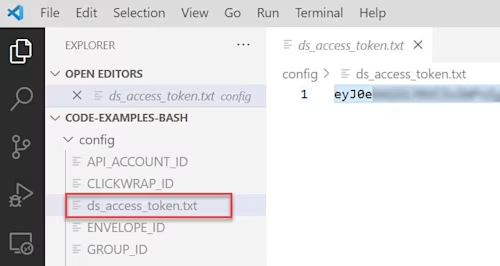
The access token is then written to a file in your Bash launcher project in the config directory, from which you can copy and paste the token to use in your code. The token will be valid for 8 hours.
In the same directory you will also find a file called private.key that you can use to authenticate using JWT.
Now you're ready to code!

Robert Knight is a senior programmer writer for the Docusign Developer Content team. He writes how-tos and accompanying code for many of Docusign's products, as well as videos and blogs. His experience includes stints at Microsoft Research and Amazon Web Services.
Related posts
