
DevelopersPublished Oct 25, 2021
From the Trenches: Automating JWT OAuth in Insomnia
Summary•6 min read
See how to set up Insomnia to authenticate to Docusign via JSON Web Token (JWT) Grant using this handy plugin.
Table of contents

In a prior blog post, Developer Support Engineer Sylvain Lebreton demonstrated how to automate the JSON Web Token (JWT) OAuth flow in Postman. If you're a Postman user looking for an easy way to authenticate against the Docusign API, be sure to check out that article.
Postman is one of the more popular API testing applications available. But some developers prefer alternative tools, such as Insomnia. Insomnia feels very similar to Postman, and you can even import and use the Docusign Postman Collection. But there are some key differences. One is that unfortunately, Insomnia doesn't allow using the eval() function in pre- and post-request scripts. This means you cannot preload external JavaScript libraries into your environment for doing things like auto-generating JWTs, for example.
The good news is that you don't need eval(), because Insomnia lets you run custom JavaScript code natively—via plugins—inside its onboard Node.js environment. And those plugins can import and use NPM packages, such as jsonwebtoken. In other words, it's far more powerful than Postman; it just takes a bit more work to configure. But worry not, the Docusign Developer team has you covered. Let's get started.
Prerequisites
Before proceeding, be sure you have a Docusign developer account.
Create your integration key
If you've already got an integration key configured for JWT, you can skip to the Install the Plugin section.
Log in to your demo Docusign account and select Admin in the main menu bar.
Under the Integrations section, select Apps and Keys.
Select Add App and Integration Key.
Name your key whatever you like.
Copy the key value and paste it somewhere safe.
Under Service Integration, select Generate RSA.
From the pop-up menu, copy the private key value and paste it somewhere safe. You won't need the public key.
Under Additional Settings - Redirect URIs, add the following URL: https://oauthdebugger.com/debug
Select Save.
Grant consent to your app
Copy and paste this URL into your browser, inserting your integration key where noted: https://account-d.docusign.com/oauth/auth?response_type=code&scope=signature%20impersonation&client_id=YOUR_INTEGRATOR_KEY_HERE&redirect_uri=https://oauthdebugger.com/debug
If necessary, login to Docusign.
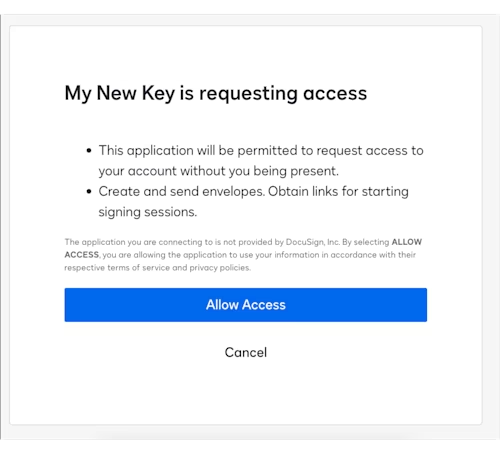
When prompted, grant consent to your app:
You should see the following:
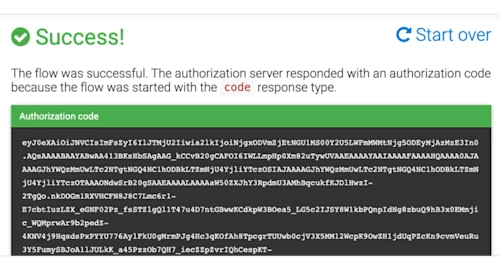
You've now granted consent to your app. You can close that browser tab; you won't need the code that was returned.
Install the plugin
The Docusign JWT Generator isn't yet available on the Insomnia Plugin Hub. For now you can grab it from the Docusign GitHub. Follow these steps:
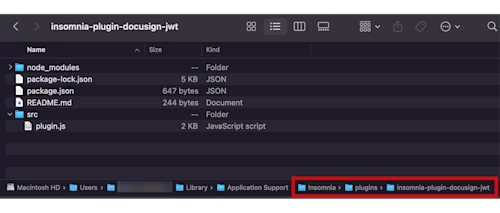
Download the files from this GitHub repo into a folder on your computer named insomnia-plugin-docusign-jwt. Note: The name of your folder must start with “insomnia-plugin-”.
In Insomnia, open Preferences (under the Insomnia menu or in the bottom left of the main window) and head to the Plugins tab. Select Reveal Plugins Folder and then move the insomnia-plugin-docusign-jwt folder into that directory:
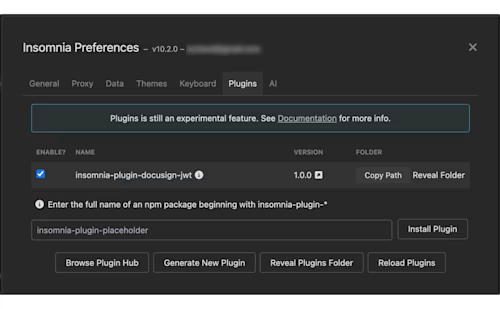
Back in Insomnia, select Reload Plugins. You should now see the plugin listed. Make sure it's enabled.
Close your preferences.
Set up your environment
The following steps assume you have a basic knowledge of Insomnia environment variables. If not, please refer to the Insomnia documentation for more information.
As with Postman and other API clients, how you configure your environment variables is mostly a matter of personal preference, but below is a design that works well.

Notes:
The Global environment applies to the entire Insomnia app. We won’t be using that for this tutorial.
The Base environment applies to a specific Collection (for example, the Docusign API Collection). This is where we will store all of our authentication parameters.
Sub-environments are perfect for storing account-specific variables, such as
accountId,envelopeId,templateId, and others.
In your Collection, select the name of the active environment, then the edit icon in the pop-up menu:

Note: In the above example, there are no subenvironments yet, so the Base Environment is displayed as the active environment.
If the environment editor opens in JSON view, switch to Table view:

Using the Table editor, add the following variables and the appropriate values from your Docusign app:
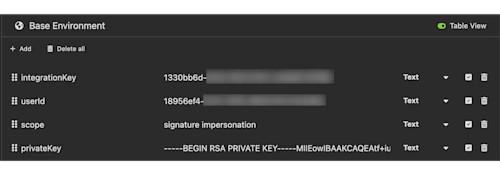
Note:
signatureandimpersonationare the bare minimum scopes that you must request in the JWT flow. Additional scopes can be requested for making calls against other Docusign APIs (Admin, Notary, CLM, etc.).IMPORTANT! You'll need to make a minor change to your private key value before proceeding. Switch to JSON view using the Table View toggle in the top-right corner. In the JSON editor, place a line break (
\n) after theBEGINand before theENDlines of your key: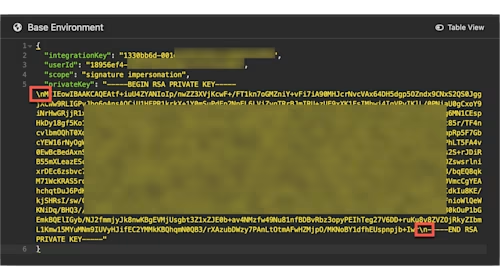
You can now switch back to Table View.
Back in the Table editor, add one final variable,
jwt. In the value column, press Control + Spacebar (same key combo for both Mac and Windows) to load the variable picker. Find and selectDocusign JWT Generator: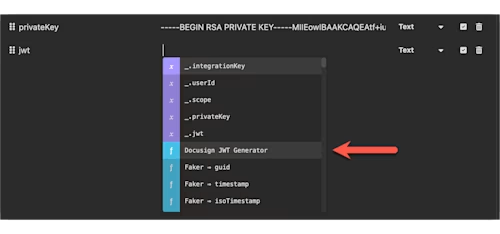
The badge should be inserted into the
jwtvalue and turn bright red:
Select the badge to open the configuration form. For each required input, select the cog icon and then select Environment Variable to load a pulldown menu. Select the appropriate variable from your Base Environment:

If you've configured everything correctly, the Live Preview should immediately display a Base64-encoded JWT.
Select Done. The plugin badge should now be blue, meaning it's been fully configured:

Configure your authorization request
Create a new POST request with the following configuration:
URL: https://account-d.docusign.com/oauth/token
Body: Form Data (Multi-part)
grant_type: urn:ietf:params:oauth:grant-type:jwt-bearerassertion:[see below]
In the
assertionvalue, press Control + Spacebar (same key combo for both Mac and Windows) to load the variable picker. Find and select yourjwtvariable: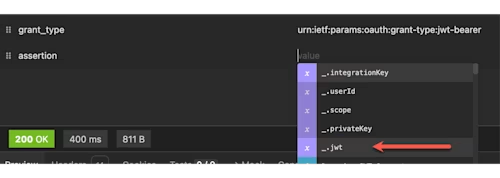
The
jwtvariable will dynamically load the auto-generated JWT from your base environment, passing it as theassertionin the request. You can hover over it to confirm that it's referencing a token.
Configure post-request script
Now add a simple script to the request that will update our environment with the new access token. Open the Scripts tab and select After-response. Paste the following code:
const jsonBody = insomnia.response.json();
insomnia.collectionVariables.set("access_token", jsonBody.access_token);
This code will parse the response from the request and store the access token in a variable called access_token in the Base Environment.
Get authorized
Go ahead and send the request. If all goes well, you should get a successful response with an access token: Congrats. You're now ready to make calls against the Docusign APIs. Be sure to reference your access_token variable in the Authorization header of your requests:

Your access token will last for 1 hour. When it expires, just send the New JWT request again and continue working. Happy testing!
Additional resources

Robert SchendleLead Digital Transformation Consultant
Rob is a Lead Digital Transformation Consultant at Docusign, based outside Washington D.C., where he provides strategic and technical expertise to customers in the financial, health sciences, and public sectors. He has over 20 years of technical implementation experience, working with organizations including The Bill and Melinda Gates Foundation, KIPP Foundation, DC Public Schools, and NOAA. He holds an undergraduate degree from Tulane University and a JD from Tulane Law School.
Related posts


DevelopersPublished Oct 25, 2021
From the Trenches: Automating JWT OAuth with Postman
Discover what's new with Docusign IAM or start with eSignature for free